men’s shirt measurements guide

Mens Shirt Measurements Guide: A Comprehensive Overview

Navigating men’s shirt sizing can be complex, with variations across brands and styles. This guide provides a detailed exploration of accurate measurements,
covering everything from chest and shoulder dimensions to sleeve length and back length. Discover resources for finding detailed size charts and avoiding common mistakes.

Understanding Shirt Fit: Key Considerations

Achieving the perfect shirt fit goes beyond simply knowing your size; it’s about understanding how different cuts complement your body type and desired style. Consider the occasion – a relaxed fit might be ideal for casual wear, while a slim fit offers a more polished look for business or formal events.

Key factors include the shirt’s silhouette, how it drapes, and where it sits on your frame. A well-fitting shirt shouldn’t pull or strain when buttoned, nor should it be excessively baggy. Pay attention to the shoulder seams, which should lie flat and align with the edge of your shoulders.

Comfort is paramount. Ensure you have a full range of motion without restriction. Think about the fabric – stretch fabrics offer greater flexibility, while stiffer materials may require a looser fit. Ultimately, the best fit is one that makes you feel confident and comfortable throughout the day. Don’t hesitate to try on multiple sizes and styles to find what works best for you.

Standard Mens Shirt Sizes (US, UK, EU)

Menswear sizing isn’t universally standardized, leading to variations between US, UK, and EU systems. In the US, shirt sizes are typically indicated by neck size and sleeve length (e.g., 15.5/32). UK sizes often correlate with chest measurements, expressed in inches (e.g., 38R – 38-inch chest, Regular fit). EU sizes utilize a numerical system, often corresponding to chest circumference in centimeters.

Generally, a US size Medium equates to a UK size 38-40 and an EU size 48-50. However, these are approximations. Neck sizes generally range from 14 to 17.5 inches, while sleeve lengths vary from 30 to 37 inches. Chest sizes typically span from 36 to 52 inches.

It’s crucial to consult specific brand size charts, as sizing can differ significantly. Always prioritize measuring yourself accurately rather than relying solely on assumed conversions. Remember that ‘R’ denotes a regular fit, ‘S’ a slim fit, and ‘T’ a tall fit, impacting overall proportions. Understanding these nuances ensures a better fit.

Taking Accurate Measurements: Tools You’ll Need

Achieving a precise shirt fit begins with accurate measurements. Fortunately, the required tools are readily available and often already in your home. A flexible measuring tape is the most essential item; a metal one isn’t suitable due to its inflexibility. It’s best to have a helper for back measurements, but measuring yourself is possible with careful use of a mirror.

Beyond the tape measure, a full-length mirror is invaluable for ensuring the tape remains level during measurements. A pen and paper (or a digital note-taking app) are needed to record your findings accurately. Comfortable, fitted clothing is recommended while measuring – avoid bulky layers.

For optimal results, measure yourself in the evening, as your body may be slightly larger then. Ensure you stand naturally with your arms relaxed. Avoid pulling the tape too tightly, as this will distort the measurement. Consistency is key; use the same measuring technique each time for reliable comparisons.

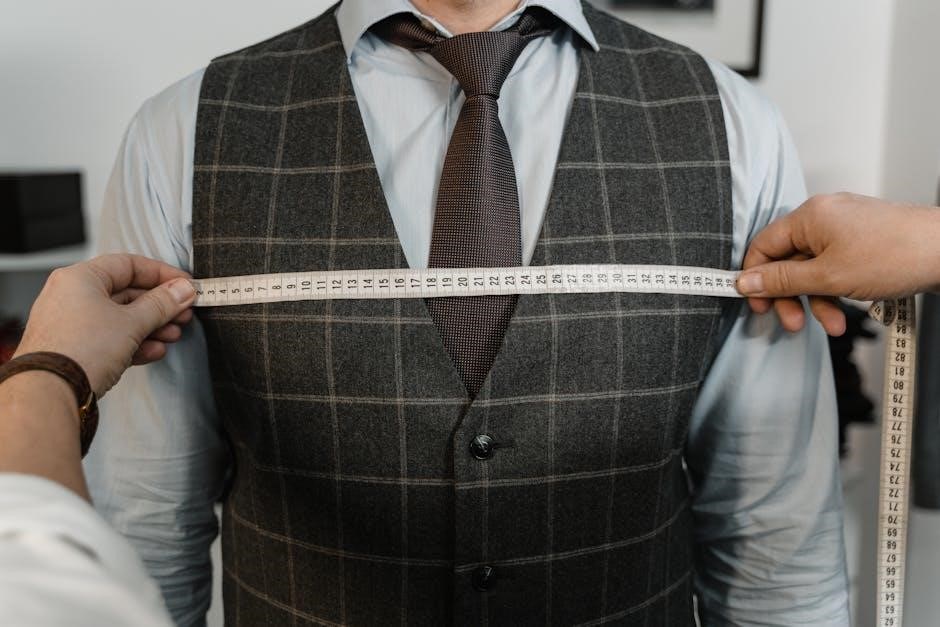
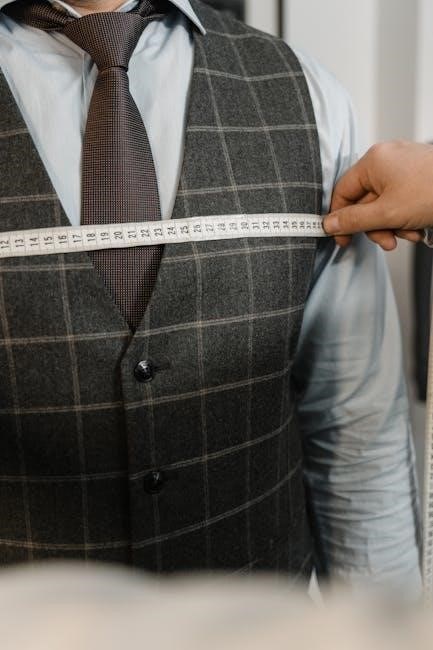
Chest Measurement: The Most Important Factor

The chest measurement is paramount when determining the correct shirt size. It directly influences the overall fit and comfort. To obtain an accurate reading, stand naturally with your arms relaxed at your sides. Wrap the measuring tape around the fullest part of your chest, typically across the nipples, ensuring the tape is level all the way around.

Avoid pulling the tape too tightly or leaving it too loose; it should be snug but not constricting. Breathe normally during the measurement. Record the measurement in inches or centimeters. For the most accurate result, it’s helpful to have someone else take the measurement for you.

Remember that shirt sizes often correspond to chest measurements. For example, a 40-inch chest typically equates to a size Large. However, this can vary between brands, so always consult the specific size chart. Consider your desired fit – a slim fit shirt will have a smaller chest measurement than a relaxed fit.

Shoulder Measurement: Ensuring a Comfortable Fit

Accurate shoulder measurement is crucial for a comfortable and well-fitting shirt, preventing strain and ensuring a natural range of motion. To measure, find the point where your shoulder meets your arm. Have someone measure from this point on one shoulder, across your back, to the same point on the other shoulder.

Keep the measuring tape straight and level, following the natural curve of your shoulders. Avoid hunching or slumping, as this will distort the measurement. A proper shoulder fit ensures the shirt lies flat across your back and doesn’t feel restrictive when moving your arms.

Shoulder width is often expressed in inches. Compare your measurement to the brand’s size chart. A shirt with the correct shoulder measurement will prevent pulling or gaping at the seams. Consider that different shirt styles – like tailored or athletic cuts – may have varying shoulder constructions impacting the ideal fit. Prioritize comfort and ease of movement.

Sleeve Length Measurement: A Detailed Guide

Determining the correct sleeve length is vital for a polished appearance and comfortable wear. Begin by bending your elbow slightly – not fully extended, nor completely flexed. Have someone measure from the center back of your neck, over your shoulder point, and down your arm to the desired sleeve end point.

The standard endpoint is typically around the wrist bone. Ensure the measuring tape remains taut but not constricting. Sleeve length is usually measured in inches. Consider your personal preference; some prefer sleeves to break slightly above the wrist, while others prefer a fuller length.

Different shirt styles have varying sleeve lengths. For example, a French cuff shirt will require a longer sleeve to accommodate the cuff. When consulting size charts, pay attention to whether the listed sleeve length is “short,” “regular,” or “long.” A properly fitted sleeve allows for a full range of motion without bunching or feeling restrictive.

Neck Measurement: Determining Collar Size

Accurately measuring your neck is crucial for a comfortable and properly fitting shirt collar. Use a flexible measuring tape, and ensure your shoulders are relaxed – don’t pull them back or hunch forward. Position the tape measure around the base of your neck, where the collar would naturally sit.

The tape should be snug but not tight; you should be able to comfortably slide a finger between the tape and your neck. Read the measurement in inches. Most shirt sizes are directly correlated to neck size, often adding 1/2 inch to 1 inch to the measurement.

For example, a 15-inch neck typically corresponds to a 15.5 or 16-inch collar size. If your measurement falls between sizes, it’s generally recommended to size up for greater comfort. A collar that’s too tight will be restrictive, while one that’s too loose will appear sloppy. Consider the shirt’s style; button-down collars often require a slightly snugger fit.

Back Length Measurement: For Optimal Shirt Length

Determining the correct back length ensures your shirt provides adequate coverage and a flattering silhouette. This measurement is taken from the base of the neck (where the collar meets the shirt) straight down to the desired hem length along your spine. It’s best to have a helper for this measurement, as maintaining a straight line can be tricky.

Stand upright with good posture, and have your helper position the measuring tape accurately. Consider your personal preference for shirt length – do you prefer to tuck your shirt in, wear it untucked, or achieve a specific cropped look? Standard back lengths typically range from 28 to 32 inches, but can vary.

Modern fits often feature shorter back lengths for a more contemporary aesthetic, while classic styles tend to be longer. When purchasing online, consult the brand’s size chart for their specific back length measurements. A properly proportioned back length prevents the shirt from appearing too short or too long, enhancing overall style and comfort.

Waist Measurement: Relevant for Fitted Styles

While not always essential for standard fit shirts, waist measurement becomes crucial when selecting fitted or tailored styles. This measurement dictates how the shirt will drape across your torso and impacts overall comfort and appearance. To obtain an accurate waist measurement, stand naturally and breathe normally.

Locate your natural waistline – typically the narrowest part of your torso, usually an inch or two above your belly button. Wrap a measuring tape around your waist, ensuring it’s snug but not constricting. Avoid pulling the tape too tightly, as this will result in an inaccurate reading. Record the measurement in inches or centimeters.

For shirts designed with a tapered fit, comparing your waist measurement to the brand’s size chart is vital. A well-fitted shirt will accentuate your physique without feeling restrictive. Remember that waist measurements can vary slightly depending on the brand and style of the shirt. Consider your body shape and desired level of comfort when choosing a size.

Understanding Shirt Styles & Their Fit

Menswear offers a diverse range of shirt styles, each with a distinct fit. Recognizing these differences is key to selecting a shirt that complements your body type and personal preference. Classic or regular fit shirts provide a comfortable, relaxed silhouette with ample room through the chest, waist, and sleeves. These are ideal for those prioritizing ease of movement.

Slim fit shirts, conversely, are cut closer to the body, offering a more modern and tailored appearance. They typically have a narrower chest and waist, and tapered sleeves. Relaxed fit shirts offer even more room than regular fit, providing a casual and comfortable feel. They are often favored for warmer weather or everyday wear.

Beyond these core styles, you’ll encounter variations like athletic fit (designed for broader shoulders and chests) and tailored fit (a balance between slim and regular). Understanding how each style is intended to fit will significantly improve your shirt-buying experience and ensure a flattering result.

Slim Fit vs. Regular Fit vs. Relaxed Fit

Distinguishing between slim, regular, and relaxed fit shirts is crucial for achieving the desired look and comfort. Slim fit shirts are designed to hug the body, showcasing a modern, tailored silhouette. They feature a close cut through the chest, waist, and sleeves, minimizing excess fabric. These are best suited for those with leaner builds.

Regular fit, the most classic option, offers a balanced silhouette with a comfortable amount of room. It provides a straight cut through the body, allowing for ease of movement without appearing overly baggy. This versatile fit suits most body types.

Relaxed fit shirts prioritize comfort, featuring a looser, more generous cut throughout. They offer ample room in the chest, waist, and sleeves, creating a casual and laid-back appearance. This style is ideal for warmer climates or those who prefer a more comfortable, unrestricted feel. Consider your body shape and desired aesthetic when choosing between these fits.

Shirt Size Charts by Brand: Variations to Expect

Understanding that shirt sizes aren’t standardized across all brands is paramount to successful online and in-store shopping. Each manufacturer often employs unique sizing guidelines, leading to inconsistencies. A size medium in one brand might fit like a large in another, or even a small! Therefore, relying solely on your usual size can be misleading.

Always consult the specific size chart provided by the brand you’re purchasing from. These charts typically detail measurements for chest, waist, sleeve length, and neck size, allowing for a more accurate comparison to your own body measurements. Pay close attention to any notes regarding the shirt’s fit – slim, regular, or relaxed – as this will also influence the sizing.

Furthermore, some brands cater to specific body types, offering tall or athletic fits. Checking customer reviews can provide valuable insights into how a particular brand’s sizing runs – whether it tends to be true to size, larger, or smaller. Don’t hesitate to measure yourself each time you shop from a new brand!

Dri-Fit & Performance Shirt Sizing

Dri-Fit and other performance shirts, designed for athletic activity, often have a more athletic or slim fit compared to traditional shirts. These are engineered to wick away moisture and provide a close-to-body feel, enhancing performance. Consequently, sizing can differ significantly, and a typical size might feel smaller.

When selecting a Dri-Fit or performance shirt, prioritize chest and shoulder measurements. These shirts are frequently designed with a degree of stretch, but it’s crucial to ensure a comfortable range of motion. Refer to the brand’s specific size chart, as Dri-Fit sizing varies between manufacturers like Nike, Adidas, and Under Armour.

Consider that performance shirts are often intended to be worn close to the skin. If you prefer a looser fit, it’s generally advisable to size up. Also, pay attention to the shirt’s intended use – a compression shirt will fit much tighter than a running shirt. Checking reviews regarding fit is highly recommended before purchasing.

T-Shirt Size Guide: Specific Considerations

T-shirts generally offer more flexibility in fit compared to dress or tailored shirts. However, accurate measurements remain crucial for achieving a comfortable and flattering look. Focus primarily on chest and length, as these dictate the overall silhouette.

Unlike more structured shirts, t-shirt sizing can be less consistent across brands. A “medium” in one brand might fit differently in another. Therefore, always consult the specific brand’s size chart before making a purchase. Pay attention to whether the chart is based on body measurements or garment measurements.

Consider the desired style – slim fit, regular fit, or relaxed fit. Slim-fit t-shirts will be closer to the body, while relaxed-fit t-shirts offer more room. Also, fabric composition impacts fit; cotton tends to shrink slightly after washing, while blends retain their shape better. Finally, read customer reviews to gauge how a particular t-shirt runs in size.

Dress Shirt Size Guide: Formal Wear Sizing

Dress shirts demand a more precise fit than casual t-shirts, as they are often worn with suits or other formal attire. Accuracy in measurements is paramount for a polished appearance. Neck and chest measurements are the primary determinants of dress shirt size, followed closely by sleeve length.

Unlike ready-to-wear shirts, bespoke or tailored dress shirts offer the most precise fit, as they are made to your exact measurements. However, when purchasing off-the-rack, understanding standard sizing is essential. Pay close attention to collar style, as different styles can affect how the shirt fits around the neck.

Consider whether you prefer a slim, regular, or classic fit. Slim-fit dress shirts are tailored closer to the body, while classic-fit shirts offer more room. Also, sleeve length should allow approximately ½ inch of shirt cuff to extend beyond the jacket sleeve. Finally, always factor in shrinkage after washing, especially with cotton shirts.

Polo Shirt Size Guide: A Balanced Approach

Polo shirts strike a balance between casual comfort and a refined look, requiring a fit that isn’t too tight or too loose. Chest measurement remains the foundational element for determining the correct size, but shoulder width and sleeve length also play crucial roles.

Unlike dress shirts, polo shirts generally offer more leeway in terms of fit. However, a well-fitting polo shirt should skim the body without clinging, allowing for comfortable movement. Consider your build – a more athletic build might benefit from a slim-fit polo, while a broader build may prefer a classic or relaxed fit.

Pay attention to the length of the polo shirt; it should fall between the hips and the waistband of your pants. Sleeve length is typically less critical than with long-sleeved shirts, but ensure it doesn’t feel restrictive. Finally, remember that polo shirts often shrink slightly after washing, so consider sizing up if you prefer a looser fit.

Online Shopping & Size Charts: Tips & Tricks

Shopping for men’s shirts online demands a strategic approach to sizing, as trying before you buy isn’t an option. Always prioritize reviewing the brand’s specific size chart – these vary significantly. Don’t rely solely on generic size conversions (S, M, L) as they can be misleading.

Before making a purchase, meticulously measure your chest, shoulders, sleeve length, and neck, then compare these measurements to the chart. Pay close attention to whether the chart specifies measurements for the shirt itself or the body. Read product descriptions carefully; some retailers detail the fit (slim, regular, relaxed).

Look for customer reviews mentioning sizing accuracy. If you’re between sizes, consider ordering both and returning the one that doesn’t fit. Check the retailer’s return policy before ordering. Utilize virtual try-on tools if available, but remember these aren’t always perfectly accurate. Finally, save size charts from brands you frequently purchase from for future reference.

Converting Between Size Systems (US to UK, EU etc.)

Navigating international sizing can be tricky when purchasing men’s shirts. US sizes differ from those used in the UK and the European Union (EU), requiring careful conversion. Generally, a US size Medium equates to a UK size 38-40 and an EU size 48-50, but these are approximations.

Neck sizes are relatively consistent, with inches being the standard. However, chest measurements are where significant differences arise. UK sizes often use the actual chest circumference, while US sizes may add a few inches. EU sizing tends to be larger than US sizing for the same chest measurement.

Sleeve length conversions are less standardized. Always refer to a specific conversion chart, as variations exist. Online conversion tools can be helpful, but double-check the results against a brand’s size chart. Remember that these are guidelines; individual brands may deviate. Prioritize measuring yourself and comparing to the specific chart for the most accurate fit, rather than relying solely on conversions.

Common Sizing Mistakes & How to Avoid Them

One frequent error is assuming your usual size will always fit, as variations between brands are significant. Another mistake is relying on generic size charts without checking the specific brand’s guide. Many individuals also neglect to measure themselves accurately, leading to ill-fitting shirts.

Ignoring body shape is also problematic; a standard size may not suit all builds. Failing to consider shirt style – slim fit versus relaxed – contributes to sizing issues. Often, people measure only the chest, overlooking shoulder and sleeve length, crucial for a comfortable fit.

To avoid these pitfalls, always measure yourself before purchasing, using a flexible measuring tape. Consult the brand’s size chart specifically, and don’t hesitate to size up if you’re between sizes. Pay attention to the shirt’s cut and fabric; some materials shrink after washing. Finally, read customer reviews for insights into a brand’s sizing accuracy, ensuring a better purchase experience.

Resources for Finding Detailed Size Charts

Numerous online resources offer comprehensive men’s shirt size charts. Brand websites are the primary source, providing specific measurements for their products; examples include J.Crew, Nordstrom, and ASOS. Retailers like Macy’s and Amazon often feature detailed size guides alongside product listings.

Dedicated sizing websites, such as SizeChart.com and ShopStyle, compile charts from various brands, offering a convenient comparison. Fashion blogs and style guides frequently publish sizing information and tips, providing valuable insights. Pinterest boards dedicated to men’s fashion often curate size charts for different styles.

Furthermore, many clothing manufacturers provide printable size charts on their websites, allowing for easy reference during measurements. YouTube channels focused on men’s style often demonstrate how to take accurate measurements and interpret size charts. Utilizing these resources ensures a more informed and successful shopping experience, minimizing returns and maximizing fit satisfaction.

Continue Reading

liftmaster installation instructions

LiftMaster Installation Instructions: A Comprehensive Guide

Embark on a seamless garage door opener upgrade! This guide, alongside the 050Actwf manual and 880LM panel instructions, ensures a successful installation process.

Safety Precautions Before Installation

Prioritize safety throughout the LiftMaster installation! Disconnect the garage door opener’s power supply at the breaker box before commencing any work. Never attempt installation if you’re uncomfortable with electrical or mechanical tasks; consult a qualified professional.

Ensure the garage door is balanced correctly – an improperly balanced door can cause severe injury. Keep children and pets away from the installation area. Wear appropriate safety glasses and gloves.

Review the 050Actwf manual thoroughly for specific safety warnings related to your model. Familiarize yourself with the function of safety sensors and never disable them. Always test the safety reversal system after installation to confirm proper operation. Ignoring these precautions could lead to serious harm.

Tools and Materials Required

Gather essential tools for a smooth LiftMaster installation! You’ll need a ladder, safety glasses, work gloves, and a socket wrench set. A drill with various bits, a screwdriver set (Phillips and flathead), and a level are also crucial.

Materials include the LiftMaster opener kit (refer to package contents), mounting hardware (brackets, bolts, nuts), wire connectors, and potentially wood screws for header bracket attachment.

Depending on your garage, you might require a stud finder, wire strippers, and electrical tape. Having the 050Actwf manual handy will confirm any model-specific requirements. Ensure all tools are in good working order before starting. A helper can also be beneficial for lifting and positioning components.

Understanding Your LiftMaster Model

Familiarize yourself with your LiftMaster opener before beginning! Different models, like those utilizing the 880LM Smart Control Panel, have unique features. The 050Actwf manual is your primary resource for model-specific details.

Understanding the components – power head, rail system, door arm, and safety sensors – is vital. Knowing how these parts interact ensures correct assembly and functionality.

Carefully review the included diagrams and specifications. This will help you identify key parts during installation and troubleshoot potential issues. Recognizing your model’s capabilities maximizes its benefits and ensures a safe, efficient operation. Proper understanding streamlines the entire process.

Identifying Key Components

Locate and understand each part before starting! The power head houses the motor and electronics, driving the entire system. The rail system guides the door’s movement, assembled from multiple sections. The door arm connects the opener to the garage door itself, transferring force for lifting.

Crucially, identify the safety sensors – these protect against door closure on obstructions. Also, find the travel limit adjustments, controlling how far the door opens and closes. The wall control provides manual operation, while the remote controls offer convenient access.

Refer to your LiftMaster 050Actwf manual for detailed diagrams. Knowing each component’s function is essential for correct installation and future maintenance.

Checking Package Contents

Verify all parts are present before beginning installation! Your LiftMaster package should include the power head, rail sections, a garage door arm, safety sensors, a wall control, and remote controls. Confirm the header bracket, mounting hardware (bolts, nuts, washers), and chain or belt are also included.

Carefully compare the received items against the parts list in your 050Actwf manual. Missing components will halt progress. Note any discrepancies immediately and contact LiftMaster support. Don’t assume parts from a previous installation are compatible.

Proper inventory ensures a smooth, frustration-free setup. A complete package is the first step towards a successfully installed LiftMaster opener.

Preparing the Garage Door

Prior to LiftMaster installation, your garage door requires preparation! Begin by thoroughly inspecting the door’s balance – it should remain stationary midway through its travel. An unbalanced door strains the opener and compromises safety. Disconnect any existing garage door opener by pulling the emergency release cord; this prevents accidental operation during installation.

Visually assess the door’s springs, hinges, and rollers for wear or damage. Address any issues before proceeding, as a faulty door will negatively impact the new opener’s performance. Ensure the door moves freely and smoothly along its tracks.

A well-maintained door is crucial for optimal LiftMaster functionality.

Balancing the Garage Door

Proper garage door balance is paramount for safe and reliable LiftMaster operation. Disconnect the opener (if present) and manually lift the door to approximately halfway. The door should remain stationary; it shouldn’t drift upwards or slam downwards.

If the door exhibits imbalance, do not proceed with the installation. Contact a qualified garage door technician to adjust the springs. Incorrect spring tension can cause serious injury or damage to the door and opener.

A balanced door minimizes strain on the LiftMaster, extending its lifespan and ensuring smooth, consistent performance. Regularly check balance, especially after any adjustments or repairs.

Disconnecting the Existing Opener (If Applicable)

Before installing your new LiftMaster, safely disconnect any existing garage door opener. First, pull the emergency release cord to disengage the opener from the door. This will allow manual operation.

Next, carefully disconnect the power supply to the old opener at the circuit breaker. Always verify the power is off before proceeding with any electrical connections. Detach the garage door arm from the door bracket and remove any wall controls or remote control receivers.

Finally, completely remove the old opener and rail system, ensuring all mounting hardware is also removed. This prepares the garage for the new LiftMaster installation.

Installing the Rail System

Begin the installation by assembling the LiftMaster rail sections. Carefully connect each section according to the included diagrams, ensuring a secure and stable connection. Once assembled, position the rail system within the garage, aligning it with the garage door’s travel path.

Next, attach the rail to the header bracket, utilizing the provided mounting hardware. Ensure the bracket is securely fastened to a solid ceiling joist or header. Proper alignment is crucial for smooth operation. Double-check all connections for tightness before proceeding.

This foundational step sets the stage for mounting the power head and connecting the door arm.

Assembling the Rail Sections

Start by carefully unpacking all rail components, verifying against the parts list to ensure everything is present. Typically, the rail comes in multiple sections designed for easy assembly within the garage space. Connect the sections using the provided joining sleeves or bolts, tightening them securely.

Pay close attention to the rail’s curvature and ensure it’s oriented correctly for proper door travel. Some models may require specific section order; consult your LiftMaster 050Actwf manual for clarification. A properly assembled rail forms the backbone of the entire system, so precision is key.

Double-check all connections for stability before moving on.

Attaching the Rail to the Header Bracket

Once the rail is fully assembled, carefully position it against the header bracket mounted above the garage door opening. Align the rail’s mounting holes with those on the bracket, ensuring a flush and secure fit. Use the bolts and washers provided in your LiftMaster kit to fasten the rail firmly to the bracket.

Proper alignment is crucial for smooth operation and to prevent binding. Double-check that the rail is level and securely attached before proceeding. Refer to the 050Actwf manual diagrams for visual guidance on correct bracket placement and rail orientation.

Tighten all bolts to the manufacturer’s specifications.

Mounting the Power Head

With the rail securely attached, carefully lift the LiftMaster power head into position. Align the mounting holes on the power head with those on the rail assembly. Utilize the provided hardware – typically bolts and washers – to connect the two components, ensuring a stable and vibration-resistant connection.

Pay close attention to the orientation of the power head, referencing the diagrams in your 050Actwf manual. Incorrect positioning can hinder operation. Tighten all bolts securely, but avoid over-tightening, which could damage the unit.

Confirm the power head is firmly mounted before moving on to the next step.

Connecting the Garage Door Arm

After securely mounting the power head, attach the garage door arm to both the power head and the garage door itself. Align the arm with the corresponding brackets on each component, ensuring a smooth and direct connection point. Use the supplied hardware – often a cotter pin or clip – to firmly secure the arm to the power head.

Next, connect the arm to the garage door using the provided bracket and hardware. Adjust the arm’s length to achieve optimal door travel, consulting the 050Actwf manual for specific guidance. Proper adjustment is crucial for smooth operation and preventing strain on the opener.

Double-check all connections for tightness and security.

Installing the Safety Sensors

Safety is paramount! Install the safety sensors, crucial for preventing the door from closing on obstructions. Position these sensors approximately six inches above the floor on either side of the garage door opening, facing each other. Ensure they are aligned and free from obstructions like tools or debris.

Wiring the sensors involves connecting them to the designated terminals on the LiftMaster power head. Refer to the 050Actwf manual for precise wiring diagrams. Incorrect wiring can compromise the safety system, so meticulous attention to detail is vital.

Test the sensors frequently during installation and after.

Positioning the Sensors

Optimal sensor placement is key for a functioning safety system. Mount the safety sensors on both sides of the garage door opening, ensuring they face each other directly. A recommended height is approximately six inches above the floor; this prevents larger objects from passing through undetected.

Alignment is critical – the sensors must be perfectly aligned for reliable operation. Use the included brackets to secure them firmly and adjust their angles as needed. Avoid pointing them at windows or reflective surfaces, which can cause interference.

Maintain a clear path between the sensors, free from obstructions like tools, boxes, or hanging items.

Wiring the Safety Sensors

Connect the sensor wires to the designated terminals on the LiftMaster power head. Typically, these are labeled “Safety Sensor” or similar. Ensure the wires are securely fastened to prevent accidental disconnections during operation. Double-check the polarity if specified in your model’s 050Actwf manual.

Use appropriate wire connectors for a reliable connection. Avoid loose connections, which can cause intermittent safety issues. Carefully route the wires along the wall or ceiling, keeping them away from moving parts.

Test the connection after wiring. A properly wired system will illuminate the sensor indicator lights on the power head.

Setting Travel Limits

Precisely define your garage door’s open and close positions using the travel limit adjustments on the LiftMaster power head. These settings prevent over-travel, safeguarding your door and opener from damage. Consult the 050Actwf manual for specific instructions tailored to your model.

Begin by adjusting the “up” travel limit, ensuring the door opens to the desired height without obstruction. Then, set the “down” limit, stopping the door just above the floor. Incremental adjustments are key for accuracy.

Test the limits repeatedly, observing the door’s movement and making fine-tune adjustments as needed. Proper travel limits are crucial for safe and reliable operation.

Programming the Remote Controls

Effortlessly connect your LiftMaster remote controls to the opener for convenient access. Locate the “Learn” button on the power head – its position may vary, so refer to your 050Actwf manual for precise location. Press and release this button to initiate the learning process.

Within 30 seconds, press and hold the desired button on your remote control until the opener’s light flashes, confirming successful programming. Repeat this process for each additional remote.

If programming fails, ensure fresh batteries are installed in the remote and try again. Some models may require clearing existing codes before adding new ones – consult the manual.

Testing the LiftMaster Opener

After installation and programming, thoroughly test your LiftMaster opener to ensure optimal functionality and safety. Begin by using the wall control to operate the door – verify smooth, full travel in both directions.

Next, test each programmed remote control, confirming reliable operation from a reasonable distance. Pay close attention to the safety sensors; the door should immediately reverse upon obstruction.

Manually test the door’s balance by disconnecting the opener and lifting it halfway – it should remain stationary. If issues arise, revisit installation steps or consult the 050Actwf manual for troubleshooting.

Installing the Wall Control

Locate a suitable, accessible position near the service door for your LiftMaster wall control, ensuring it’s within sight of the garage door and away from obstructions. Mount the bracket securely using the provided screws.

Connect the wires from the power head to the wall control terminals, observing correct polarity as detailed in the 050Actwf manual. Ensure a snug fit to prevent disconnections.

Snap the wall control onto the mounted bracket. Test its functionality by pressing the button – the garage door should respond immediately. If it doesn’t, double-check wiring and power supply.

Troubleshooting Common Installation Issues

Door reverses unexpectedly? Verify safety sensor alignment and wiring, referencing the 050Actwf manual for detailed diagrams. Obstructions in the sensor path are a frequent cause.

Opener doesn’t respond to remote? Reprogram the remote following the instructions, ensuring it’s compatible with your LiftMaster model. Check battery levels as well.

Travel limits incorrect? Re-adjust the up and down travel limits using the adjustment screws on the power head, carefully observing the door’s full range of motion. Consult the manual for precise steps.

LiftMaster Smart Control Panel Installation (880LM)

Mounting the 880LM panel requires a suitable location near a power outlet and within Wi-Fi range. Securely attach the panel using the provided screws, ensuring it’s level.

Wiring is crucial; connect the panel to the LiftMaster opener following the detailed installation manual. Proper connections guarantee seamless communication and functionality.

Initial setup involves connecting to your home’s Wi-Fi network through the MyQ app. This enables remote control and monitoring of your garage door. Refer to the panel’s guide for specific app instructions and troubleshooting tips.

Understanding the LiftMaster Manual (050Actwf)

The 050Actwf manual is your primary resource for a successful LiftMaster installation. It details crucial safety precautions, component identification, and step-by-step instructions.

Pay close attention to the diagrams illustrating rail assembly, power head mounting, and safety sensor placement. These visuals clarify complex procedures, minimizing errors.

Familiarize yourself with the troubleshooting section to address common installation issues. The manual also explains programming remote controls and setting travel limits for optimal performance. Download a PDF copy for convenient access during installation, ensuring a smooth and efficient process.

Downloading LiftMaster Manuals (PDF)

Accessing LiftMaster manuals in PDF format provides convenient, on-demand guidance throughout your installation. Websites like downloadparadise.site offer quick access to these essential resources, including the 050Actwf manual.

Having a digital copy allows you to easily reference diagrams and instructions on a tablet or smartphone while working in the garage. This eliminates the need to constantly handle a paper manual.

Ensure you download the correct manual for your specific LiftMaster model to avoid confusion. PDF versions are ideal for printing specific pages or zooming in on detailed illustrations, streamlining the installation process.

Warranty Information and Registration

Protect your investment by understanding your LiftMaster opener’s warranty coverage. Registration is crucial for validating your warranty and ensuring prompt service if needed. Details regarding the warranty period and covered components are typically found within the 050Actwf manual.

Online registration is often the quickest and easiest method, usually accessible through the LiftMaster website. Keep your purchase receipt and model number handy during the registration process.

Proper registration guarantees access to potential repairs, replacements, or support services as outlined in the warranty terms, offering peace of mind after installation.

Post-Installation Maintenance

Ensure long-lasting performance of your LiftMaster opener with regular maintenance. Periodically inspect the track for obstructions and lubricate moving parts – refer to the 050Actwf manual for recommended lubricants.

Check the safety sensors monthly to confirm proper alignment and functionality; these are vital for safe operation. Tighten any loose bolts or screws on the rail system and power head.

Routine inspections prevent potential issues and extend the life of your opener. Consider a professional service check-up annually to address any hidden concerns and maintain optimal performance.

Continue Reading

step by step face painting guide

Face painting unlocks creativity for all ages, offering a delightful art form! Beginner guides and tutorials empower anyone to create vibrant designs, step-by-step.

From simple butterflies to superhero masks, learning face painting is accessible and fun, fostering imagination and joyful expression at events and beyond;

What is Face Painting?

Face painting is a captivating art form where the human face becomes the canvas! It’s about transforming appearances using cosmetic-grade paints, creating whimsical designs and bringing imaginations to life. Whether it’s a simple butterfly or a complex superhero mask, face painting offers a unique avenue for self-expression.

Beginner guides break down the process into manageable step-by-step tutorials, making it accessible to everyone. These guides often cover essential techniques, from loading brushes correctly to blending colors seamlessly. Learning resources, including online courses and video libraries, provide comprehensive instruction. It’s a fantastic way to add fun and creativity to parties, events, or simply a playful afternoon!

The Joy of Face Painting for Kids and Adults

Face painting sparks immense joy in both children and adults! For kids, it’s a magical experience – transforming into their favorite characters fuels imagination and creates lasting memories. Step-by-step tutorials empower anyone to bring these fantasies to life, fostering creativity and self-expression.

Adults also find delight in face painting, whether it’s for themed events, Halloween, or simply artistic enjoyment. Learning through beginner guides and online resources unlocks a new skill and provides a unique outlet. It’s a fantastic way to connect with inner creativity and share joy with others, making every occasion more vibrant and fun!

Essential Face Painting Supplies

Essential supplies include safe, non-toxic paints, varied brushes, sponges, and optional glitter/stencils. Tutorials highlight the best tools for vibrant, easy designs!

Choosing Safe and Non-Toxic Face Paints

Prioritizing safety is paramount when selecting face paints, especially for children. Always opt for paints specifically labeled as “non-toxic” and “hypoallergenic” to minimize the risk of allergic reactions or skin irritation. Look for paints that comply with safety regulations, such as those approved by the FDA or adhering to European cosmetic standards.

Water-based face paints are generally considered safer than alcohol-based options, as they are less drying to the skin. Before applying any paint, perform a patch test on a small area of skin to check for sensitivity. Tutorials often emphasize the importance of quality paints for beautiful, safe designs!

Types of Face Paint: Water-Based vs. Alcohol-Based

Water-based face paints are the most popular choice for beginners and children, offering easy application, simple removal with soap and water, and a lower risk of skin irritation. They’re ideal for creating vibrant, colorful designs, and many tutorials focus on mastering techniques with this type.

Alcohol-based paints, while offering superior longevity and a matte finish, are less forgiving and require more skill. They dry quickly and are more difficult to blend, and removal necessitates a specialized makeup remover. These are often favored by professionals for detailed work, but require caution.

Brushes: Shapes, Sizes, and Uses

Face painting brushes come in a variety of shapes and sizes, each serving a specific purpose. Round brushes are excellent for outlining and detailed work, while flat brushes are ideal for base coating and blending larger areas. Angle brushes create sharp lines and precise shapes, perfect for petals or leaves.

Brush size impacts detail; smaller brushes offer precision, while larger brushes cover more ground quickly. Many tutorials demonstrate how to load brushes correctly and maintain them for optimal performance, ensuring smooth application and preventing paint wastage.

Sponges and Other Application Tools

Beyond brushes, sponges are crucial for creating smooth, even base coats and textured effects in face painting. High-density sponges offer better control, while sea sponges produce a more stippled, organic look. Brush pens are fantastic for fine details and outlining, offering precision similar to a brush but with added convenience.

Stencils simplify complex designs, especially for beginners, ensuring clean lines and consistent shapes. Many tutorials showcase how to effectively use these tools alongside brushes and sponges, expanding creative possibilities and achieving professional-looking results.

Glitter, Stencils, and Additional Accessories

Glitter adds sparkle and magic to any face painting design! Use cosmetic-grade glitter and a suitable adhesive, like fixer gel, for safe application. Stencils are invaluable for beginners, enabling precise shapes and designs effortlessly. They streamline complex patterns, like spiderwebs or scales, making intricate work achievable.

Other accessories, such as rhinestones and face paint brushes of varying sizes, enhance creativity. Many tutorials demonstrate how to integrate these elements, elevating designs from simple to spectacular. Experimentation is key to discovering unique effects!

Preparing for Face Painting

Skin preparation is crucial: clean and moisturize the face first! A tidy workspace and strict hygiene practices ensure safety and fantastic results.

Skin Preparation: Cleaning and Moisturizing

Before beginning any face painting adventure, proper skin preparation is absolutely essential. Start with a gentle cleanse to remove any dirt, oils, or lotions. A mild soap and water work wonderfully, followed by a thorough pat-dry with a clean, soft towel.

Next, apply a light, fragrance-free moisturizer. This creates a smooth canvas for the paints and helps protect the skin. Avoid heavy creams, as they can interfere with paint adhesion. Allow the moisturizer to fully absorb before applying any paint.

Remember, a well-prepared surface ensures vibrant colors, comfortable wear, and minimizes the risk of irritation. Prioritizing skin health is key!

Setting Up Your Workspace

A well-organized workspace is crucial for a smooth face painting experience. Choose a well-lit area with a stable surface, ideally covered with a disposable tablecloth for easy cleanup. Arrange your supplies – paints, brushes, sponges, water container, paper towels – within easy reach.

Keep a mirror handy for both you and the person being painted. Have a designated area for clean and dirty brushes, preventing cross-contamination. Consider a small trash can for disposable items.

Organization minimizes stress and maximizes creativity, allowing you to focus on the art itself. A tidy space equals a happy painter!

Hygiene and Safety Precautions

Safety is paramount when face painting. Always use hypoallergenic, non-toxic, and FDA-compliant paints specifically designed for skin. Never use acrylics or craft paints! Clean brushes thoroughly with soap and water after each use to prevent bacterial growth.

Avoid painting anyone with open wounds, rashes, or infections. Use a fresh sponge or brush for each person to prevent cross-contamination. Perform a patch test on a small skin area before applying paint extensively, checking for allergic reactions.

Prioritize cleanliness and responsible practices for a fun and safe experience!

Basic Face Painting Techniques

Mastering basic techniques—loading brushes, creating lines and shapes, and blending colors—is crucial. Stencils offer precision, enhancing designs for beginners and pros alike!

Loading Your Brush or Sponge

Properly loading your brush or sponge is fundamental to successful face painting. Dip the brush tip into the paint, avoiding submerging it completely. Gently swirl to coat the bristles, then tap off any excess against the palette’s edge.

For sponges, dab lightly to absorb paint; avoid pressing hard, which can create a muddy consistency. A slightly damp sponge works best with water-based paints. Remember, less is often more! Building up layers gradually provides better control and prevents cracking.

Experiment with different loading techniques to discover what works best for various paint types and desired effects. Consistent loading ensures smooth, even application and vibrant designs.

Creating Lines, Dots, and Shapes

Mastering basic elements like lines, dots, and shapes is crucial for any face painting design. For clean lines, use a fine-tipped brush and maintain consistent pressure; Practice varying line thickness by adjusting brush angle and paint load.

Dots are easily created with the brush tip, varying size with pressure. Shapes, like hearts or stars, can be freehanded or aided with stencils. Start with light sketches before applying full color.

Consistent practice builds muscle memory and control. These foundational skills unlock more complex designs and allow for creative expression.

Blending Colors Effectively

Achieving seamless color transitions is key to professional-looking face paint. Begin by applying the lighter color first, then gently layer the darker shade along the edge you want to blend. Use a clean, damp sponge or brush to softly work the colors together.

Circular motions and light pressure prevent harsh lines. Avoid over-blending, which can muddy the colors. Water-based paints blend more easily than alcohol-based. Practice blending different color combinations to expand your skillset.

Blending creates depth and dimension, elevating your designs.

Using Stencils for Precise Designs

Stencils are invaluable for creating intricate details and consistent shapes in face painting, especially for beginners. Secure the stencil firmly against the skin using gentle pressure – avoid movement! Load a stencil brush or sponge with a small amount of paint, then use a pouncing or stippling motion.

Avoid brushing across the stencil, as this can cause paint to bleed underneath. Lift the stencil carefully to reveal the design. Clean your stencils immediately after use to prevent paint buildup. Experiment with layering colors and multiple stencils!

Step-by-Step Face Painting Tutorials

Tutorials offer clear, guided instructions for popular designs like butterflies, superhero masks, and kitty cats, building confidence and skill with each step!

Easy Butterfly Design

Creating a butterfly is a fantastic starting point for beginners! Begin with a light base coat, then use a round brush to paint symmetrical wing shapes extending from the eyes.

Next, add colorful details within each wing using dots, swirls, and teardrops – layering colors enhances the effect. Don’t forget antennae extending from the forehead!

For added sparkle, gently apply glitter to the wings using a clean brush or sponge. Remember to use face paint specifically designed for skin, ensuring safety and vibrant results. Practice makes perfect, so embrace experimentation and have fun with this beautiful design!

Superhero Mask Tutorial

Transform into a powerful hero with a classic mask design! Start by outlining the mask shape around the eyes and bridge of the nose using a fine-tipped brush and your chosen color – blue, red, or black are popular choices.

Fill in the mask area with solid color, ensuring even coverage. For a dynamic effect, add shading around the edges to create depth. Consider adding a superhero emblem, like a star or lightning bolt, on the forehead or cheeks.

Remember to use non-toxic paints and allow each layer to dry slightly before adding details. This design is quick, impactful, and perfect for inspiring imaginative play!

Kitty Cat Face Painting Guide

Unleash your inner feline with an adorable kitty cat design! Begin by painting the base coat – typically white – across the face, avoiding the eyes and lips. Use a sponge for smooth application.

Next, add a black nose and whiskers using a fine brush. Don’t forget the cute triangular ears above the eyebrows! For extra detail, paint a pink inner ear and add small white highlights to the eyes to make them sparkle.

This classic design is easy to create and guaranteed to bring smiles. Snazaroo face paints are perfect for this look!

Simple Flower Design

Create a blossoming masterpiece with a simple flower design! Start with a light-colored base around the eye, like pink or lavender, using a sponge. Then, using a round brush and a contrasting color – perhaps white or yellow – begin painting petals radiating outwards from the center.

Add a small, colorful dot in the center of the flower to represent the flower’s heart. For added flair, outline the petals with a darker shade to make them pop. This design is quick, cheerful, and perfect for beginners!

Spooky Spiderweb Design

Transform into a creature of the night with a spooky spiderweb! Begin by painting a thin, white line extending from the outer corner of the eye towards the hairline. Then, create several curved lines radiating outwards from this initial line, resembling spiderweb strands.

Connect these strands with additional curved lines, forming a web-like pattern. For a chilling touch, add a small black spider to the web using a fine-tipped brush. This design is ideal for Halloween or any spooky occasion, offering a delightfully eerie look!

Advanced Face Painting Techniques

Elevate your artistry! Master depth, dimension, highlighting, and shading for realistic effects. Explore special FX using fake blood and wax for stunning transformations.

Creating Depth and Dimension

Achieving a three-dimensional look in face painting moves beyond flat color application. It requires understanding how light interacts with the face’s contours. Begin by identifying the natural highlights and shadows – cheekbones, brow ridges, and under the chin are key areas.

To create depth, use darker shades in recessed areas, subtly blending outwards. Conversely, apply lighter shades to protruding features to make them ‘pop’. Layering colors is crucial; build up gradually rather than applying heavy pigment at once. This allows for smoother transitions and a more realistic effect. Practice blending techniques to avoid harsh lines, and remember that subtle changes can make a significant impact.

Highlighting and Shading

Highlighting and shading are fundamental techniques for transforming a flat face paint design into a captivating, realistic image. Highlighting involves applying lighter shades to areas where light naturally falls – the brow bone, bridge of the nose, and upper cheekbones. This brings those features forward, creating a sense of prominence.

Conversely, shading utilizes darker tones in recesses like under the cheekbones, along the jawline, and within the eye sockets. This creates depth and definition. Blending is paramount; seamlessly merge the shades to avoid harsh lines. Experiment with different color combinations to achieve desired effects, and remember less is often more!

Using Fake Blood and Wax (Special FX)

Special FX face painting elevates designs to dramatic levels! Begin with a base layer of face paint, then carefully apply spirit gum to adhere prosthetic wax. Sculpt the wax to create wounds, scars, or other desired textures. Blend the edges seamlessly with a sponge and paint over with appropriate colors – reds, purples, and browns for realistic bruising.

Fake blood adds a chilling touch. Use a non-toxic, water-based formula and apply sparingly for a believable effect. Remember to test all products on a small skin area first to check for allergies. Practice makes perfect – experiment with layering and blending for truly terrifying results!

Face Painting for Events and Business

Face painting at events can become a profitable business! Develop a portfolio, price services competitively, and market your skills to build a thriving creative venture.

Pricing Your Services

Determining your pricing requires careful consideration of several factors. Begin by researching local competitors to understand the prevailing rates for face painting services in your area.

Consider your experience level; beginners may charge less, while seasoned professionals can command higher fees. Factor in the cost of your supplies – paints, brushes, glitter, and hygiene products – and allocate a reasonable amount for replacement and upkeep.

Pricing structures can vary: you might charge per hour, per face, or offer package deals for events. A basic face design could start at $5-$10, while more elaborate designs could range from $15-$25 or more. Don’t undervalue your time and artistic skill!

Marketing Your Face Painting Business

Effective marketing is crucial for attracting clients. Create a professional online presence with a website or social media pages showcasing your face painting designs and services. High-quality photos of your work are essential!

Utilize platforms like Facebook and Instagram to share your creations, run promotions, and engage with potential customers. Consider offering introductory discounts or package deals to incentivize bookings.

Networking with event planners, party organizers, and local businesses can generate leads. Word-of-mouth referrals are powerful, so encourage satisfied clients to spread the word about your artistry!

Building a Portfolio

A strong portfolio is your visual resume! Document your face painting work with high-quality photographs showcasing a diverse range of designs and skill levels. Include images of both simple and complex creations, demonstrating your versatility.

Prioritize clear, well-lit photos that accurately represent your artistry. Seek opportunities to face paint at events, even for free initially, to build your portfolio quickly.

Request permission to photograph your clients’ faces and share the images online. A compelling portfolio builds trust and attracts potential clients seeking a skilled face painter;

Troubleshooting Common Face Painting Issues

Paint cracking or flaking? Ensure proper layering and drying times. Skin sensitivity? Always use hypoallergenic, non-toxic paints and perform patch tests beforehand!

Paint Cracking and Flaking

Cracking and flaking are common frustrations for face painters, but easily addressed! Often, this occurs when layers haven’t fully dried before applying the next. Allow each layer to set – a quick blast of cool air from a fan can expedite this process.

Another culprit is applying too much paint at once; thinner, multiple layers are far superior to one thick coat. Ensure your skin is properly prepped with a light moisturizer, as dry skin exacerbates cracking. Finally, consider the paint quality; cheaper paints are more prone to this issue.

Using a setting spray (fixer) can also help to bind the paint and prevent flaking, especially during active events!

Allergic Reactions and Skin Sensitivity

Skin sensitivity and allergic reactions are serious concerns in face painting. Always prioritize safety by using hypoallergenic, non-toxic, and FDA-compliant face paints. Perform a patch test on a small skin area 24 hours before full application, especially for children or individuals with sensitive skin.

Be vigilant for signs of reaction – redness, itching, swelling, or rash. Immediately remove the paint with a gentle cleanser and discontinue use if any irritation occurs. Avoid painting over cuts, eczema, or sunburned skin.

Maintain impeccable hygiene to prevent bacterial infections, which can mimic allergic responses.

Removing Face Paint Safely

Removing face paint gently is crucial to avoid skin irritation. Start with lukewarm water and a soft, clean cloth. Avoid harsh scrubbing, which can cause redness and discomfort. Baby wipes or a mild, fragrance-free cleanser can effectively lift the paint.

For stubborn glitter or heavier designs, consider using a dedicated face paint remover or a small amount of oil (coconut or olive oil) to break down the pigments. Always follow with a gentle moisturizer to replenish skin hydration.

Never use alcohol or acetone, as these can severely dry and damage the skin.

Resources and Further Learning

Online tutorials, communities, and forums offer endless inspiration and support! Explore courses and books to elevate your face painting skills further.

Online Tutorials and Courses

Numerous online platforms provide comprehensive face painting tutorials, catering to all skill levels. From beginner-friendly introductions to advanced techniques, these resources offer step-by-step guidance. Many courses, like those offering 25+ video lessons, provide on-demand access and community support.

Explore video libraries with over 50 extra tutorials, empowering you to master popular designs. Professional courses focus on building a profitable business, covering fast designs, business training, and earning strategies. These resources are invaluable for honing your craft and expanding your repertoire, with over 5000 students already enrolled!

Face Painting Communities and Forums

Engaging with online face painting communities and forums is a fantastic way to learn and grow. These platforms offer a space to share designs, ask questions, and receive constructive feedback from fellow artists. Connect with experienced painters who readily offer tips and tricks, enhancing your step-by-step learning journey.

Discover inspiration, troubleshoot challenges, and stay updated on the latest trends. These communities foster a supportive environment for both beginners and professionals, providing valuable resources and encouragement. Sharing your progress and participating in discussions accelerates skill development and builds confidence.

Recommended Books and Websites

Numerous resources exist to elevate your face painting skills, particularly when following a step-by-step guide. Websites dedicated to face painting often host extensive tutorials, design galleries, and product reviews, offering valuable insights. Books provide structured learning, covering techniques, safety, and design ideas in detail.

Explore platforms offering online courses and video lessons for a more immersive experience. These resources cater to all skill levels, from beginners to professionals, ensuring continuous learning and improvement. Investing in quality materials and knowledge empowers you to create stunning and safe designs.

Continue Reading

wow cata skinning guide

WoW Cataclysm Skinning Guide: A Comprehensive Leveling Strategy (03/09/2026)

Welcome, adventurers! This detailed guide streamlines Cataclysm Skinning, from 1-300․ We’ll cover optimal zones, mob choices, and trainer locations for efficient leveling․

Maximize your profits and skill gains with our expert tips․ Prepare to master the art of harvesting hides in WoW!

Skinning in World of Warcraft: Cataclysm represents a pivotal shift for the profession, offering lucrative opportunities alongside essential crafting material acquisition․ This expansion introduces significant changes to the leveling process, demanding a strategic approach to maximize efficiency and profitability․ Unlike previous iterations, Cataclysm emphasizes faster skill progression, allowing dedicated players to reach the maximum skill level of 300 relatively quickly․

The revamped world introduces new creatures and zones, each presenting unique skinning challenges and rewards․ Understanding these nuances is crucial for success․ This guide aims to provide a comprehensive overview of Cataclysm Skinning, covering everything from initial trainer visits to advanced techniques for maximizing yields․ We’ll explore the benefits of skinning, its synergy with other professions, and the economic potential it unlocks․

Furthermore, Cataclysm introduces the Master of Anatomy specialization, enhancing the profession with valuable bonuses; This guide will delve into the intricacies of this specialization and how to best utilize its advantages․ Whether you’re a seasoned veteran or a newcomer to WoW, this resource will equip you with the knowledge to thrive in the world of Cataclysm Skinning․

Why Skinning in Cataclysm?

Skinning in Cataclysm offers compelling reasons for players to invest their time and effort․ Primarily, it’s a consistent source of income․ The demand for leather and hides remains high, fueling the needs of Leatherworking, Mailcrafting, and various other crafting professions․ This consistent demand translates into reliable gold generation, especially when targeting efficiently farmed mobs․

Beyond the economic benefits, skinning provides self-sufficiency․ Players can acquire materials for their own crafting endeavors, reducing reliance on the Auction House and saving significant gold․ The expansion’s new zones introduce a wealth of creatures with unique hides, offering diverse crafting possibilities․

Moreover, Cataclysm’s skinning progression is relatively straightforward, making it an accessible profession for players of all levels․ The Master of Anatomy specialization further enhances its appeal, providing a critical strike rating bonus․ Ultimately, skinning in Cataclysm is a rewarding profession that combines profitability, self-reliance, and a tangible contribution to the game’s economy․

Understanding Skinning Trainers and Skill Points

Skinning progression relies on learning from trainers and accumulating skill points․ Initially, visit any trainer in the main cities of old Azeroth – simply ask a guard for directions․ You’ll begin by learning “Skinning Apprentice․” As you skin creatures, you’ll gain skill points, gradually increasing your proficiency․

Trainers are essential for unlocking higher skill levels․ They’re located in major cities across Azeroth and Outland, with specific trainers appearing in Cataclysm zones as you progress․ Remember to regularly check for new skills available at each trainer․ Failing to do so will cap your ability to gain further skill points․

Skill points are earned by successfully skinning creatures․ The amount of skill gained depends on your current skill level and the level of the creature․ Higher-level creatures generally yield more skill points․ It’s crucial to understand that skill gains diminish as you approach the next skill rank․ Therefore, efficient zone selection is vital for maximizing your leveling speed․

Skinning Leveling 1-180: Classic & Burning Crusade Content

Leveling Skinning from 1-180 primarily utilizes content from Classic and Burning Crusade․ Ashenvale is a fantastic starting location, offering plentiful wildlife for practice․ Focus on skinning any beast you encounter while questing or exploring․ Early zones like Elwynn Forest and Durotar also provide consistent, albeit slower, gains․

As you approach skill level 60-110, consider heading to Burning Crusade zones like Hellfire Peninsula and Terokkar Forest․ The increased mob density and variety of creatures accelerate the leveling process․ Prioritize Talbuks and Clefthoof in these areas․

Between 110-180, continue in Outland, expanding to Nagrand and Shadowmoon Valley․ Look for Wind Serpents and various beasts․ Remember to visit a trainer in Shattrath City to learn the next tier of skinning skills as you gain experience․ Consistent skinning alongside questing will efficiently bring you to 180, preparing you for Cataclysm content․

Skinning Leveling 180-220: Early Cataclysm Zones

Upon entering Cataclysm content at skill level 180, Mount Hyjal and Vashj’ir become prime leveling grounds․ Initially, focus on the early areas of Mount Hyjal, specifically the forests surrounding the Shrine of Aviana․ The abundance of wildlife, including boars and various beasts, provides consistent skinning opportunities․

Riverbed Crocolisks and Neferset Crocolisks in Uldum (though slightly later in this range) offer excellent skinning practice․ Sand Scorpions and Coyotes are also viable options․ Remember to frequently check your skill level and visit a Cataclysm trainer in a major city to learn new ranks․

Vashj’ir, while offering unique challenges, presents a steady stream of aquatic creatures to skin․ Prioritize the larger fish and sea beasts for better yields․ Maintaining a consistent rhythm of skinning alongside questing will efficiently push you towards 220, preparing you for the more challenging zones ahead․

Skinning Leveling 220-250: Mount Hyjal & Vashj’ir

As you progress from 220 to 250, deeper exploration of Mount Hyjal and Vashj’ir is crucial․ Within Hyjal, concentrate on the areas surrounding the Spires of Arakkoa and the Slithering Scar․ The increased density of hostile creatures guarantees a constant supply of hides․

Vashj’ir continues to be a reliable source, particularly focusing on the deeper sea zones․ Look for larger, more formidable aquatic beasts; they yield higher-quality materials and contribute more effectively to your skill gains․ Remember to utilize underwater breathing assistance to maximize your time submerged․

Efficiently navigating these zones while completing associated quests will accelerate your leveling․ Prioritize mobs that are quickly dispatched, allowing for rapid skinning and minimal downtime; Consistent skinning alongside questing will smoothly transition you towards the next skill bracket․

Skinning Leveling 250-285: Deepholm & Uldum

Reaching the 250-285 range necessitates venturing into Deepholm and Uldum․ Deepholm, with its Titan ruins and stone elementals, offers a unique skinning experience․ Focus on the Troggs and stone elementals scattered throughout the zone; they provide consistent yields of heavy hides․

Uldum, the desert excavation site, presents opportunities with the Tol’vir and various desert creatures․ The higher mob density in Uldum allows for rapid skinning, but be mindful of the challenging terrain and potential for PvP encounters․ Prioritize mobs near quest hubs to combine leveling with quest progression․

Remember to utilize skinning speed-enhancing consumables if available․ Efficiently rotating between these two zones, based on mob availability and competition, will optimize your leveling speed․ Consistent effort will quickly propel you towards the final skill bracket․

Skinning Leveling 285-300: Twilight Highlands

The Twilight Highlands represent the final stretch for Cataclysm skinning, from 285 to 300․ This zone is densely populated with creatures offering valuable, high-end hides․ Concentrate your efforts on the Black Dragonflight drakes and the corrupted wildlife roaming the highlands․

Specifically, target the Highland Drake and the various corrupted boars․ These mobs drop the materials needed to quickly gain those final skill points․ Be prepared for competition from other players, as this is a popular leveling spot․ Utilizing a skinning knife with increased speed is highly recommended․

Consider grouping with other skinners to maximize efficiency, or focus on less contested areas․ Consistent skinning, combined with occasional use of experience-boosting items, will swiftly bring you to the coveted skill level of 300․ Congratulations, master skinner!

Optimal Zones for Specific Level Ranges

Efficient skinning requires strategic zone selection․ For levels 1-180, classic zones like Ashenvale and Elwynn Forest provide ample opportunities, focusing on boars and wolves․ Burning Crusade content (180-220) benefits from Terokkar Forest and Nagrand, targeting Talbuks and Clefthoof․

Early Cataclysm zones (220-250) – Mount Hyjal and Vashj’ir – offer quick progression․ Hyjal’s furbolgs and Vashj’ir’s naga are ideal․ Deepholm and Uldum (250-285) present unique challenges and valuable materials; focus on Sandstone Drake and Tol’vir․

Finally, Twilight Highlands (285-300) is the endgame, with Highland Drakes providing the final skill gains․ Remember to consider mob density and competition․ Prioritize zones aligning with your current level for maximum yield and minimal downtime․ Adapting to zone availability is key to swift leveling!

Best Mobs for Skinning in Cataclysm

Identifying prime mobs is crucial for efficient skinning․ In early Cataclysm zones, Riverbed Crocolisks (82-84) and Neferset Crocolisks offer consistent leather․ Sand Scorpions and Venomblood Scorpions are also reliable sources․ Coyotes provide a steady, if less lucrative, skinning experience․

Mount Hyjal’s Furbolgs are excellent for thicker hides, while Vashj’ir’s Naga yield scales․ Deepholm’s Sandstone Drakes are highly sought after for their unique scales, though competition can be fierce․ Uldum’s Tol’vir provide valuable desert hides․

Twilight Highlands’ Highland Drakes are the ultimate target for reaching 300 skill․ Prioritize mobs with high skinning yield and respawn rates․ Remember to utilize tracking abilities and consider mob density when selecting your hunting grounds․ Efficient mob selection dramatically accelerates your leveling process!

Skinning and Companion Professions

Skinning synergizes exceptionally well with Leatherworking and Tailoring․ Leatherworking directly utilizes the leather and hides you gather, creating armor, bags, and other valuable items․ This self-sufficiency minimizes gold expenditure and maximizes profit potential․

Tailoring benefits indirectly, as some cloth armor recipes require leather components sourced from skinning․ However, the connection isn’t as strong as with Leatherworking․ Engineering can also utilize some leather scraps, but it’s a less common pairing․

Consider leveling Leatherworking alongside Skinning for optimal resource management․ You’ll transform raw materials into finished products, increasing your overall income․ Alternatively, selling raw materials on the Auction House is a viable strategy, especially for rarer hides․ A combined approach offers flexibility and profitability․

Maximizing Skinning Yields: Tips & Tricks

Efficient skinning requires more than just finding beasts! Always prioritize skinning mobs with a higher chance of yielding valuable materials like Heavy Hide or Rugged Leather․ Utilize add-ons like ‘GatherMate2’ to track resource node locations and skinning yields in specific zones․

Movement speed is crucial․ Minimize travel time between kills by optimizing your route and utilizing mounts․ Consider talents or gear that boost movement speed․ Remember, more skins per hour translate to faster leveling and greater profits․

Don’t overlook the value of skinning knives! Upgrading your knife improves skinning speed and reduces the chance of failure․ Regularly inspect and repair your knife to maintain optimal performance․ Finally, be mindful of competition – popular skinning spots can become crowded, impacting your yields․

The Master of Anatomy Specialization

Master of Anatomy, the sole specialization for Skinning in Cataclysm, significantly enhances your profession․ Reaching skill level 525 unlocks a new rank, granting a substantial 80 critical strike rating – a valuable bonus for combat-focused players․

This specialization isn’t merely about stat boosts; it fundamentally alters how you approach skinning․ The increased critical strike chance translates to a higher probability of obtaining bonus materials during skinning, like extra leather or valuable byproducts․

Prioritize leveling Skinning to unlock Master of Anatomy as quickly as possible․ The benefits extend beyond raw material gain, offering a tangible advantage in player versus player combat and raid encounters․ It’s a worthwhile investment for any dedicated Skinner seeking to maximize their profession’s potential․

Skinning Materials and Their Value

Cataclysm introduced a wealth of new skinning materials, each with fluctuating market value․ Heavy Leather, Rugged Leather, and Thick Hide form the base of many crafting recipes, maintaining consistent demand․ However, rarer materials command premium prices․

Borean Leather, sourced from Northern Wastes creatures, and Frosthide Leather, from Howling Fjord beasts, are highly sought after by Leatherworkers․ Volcanic Hide, obtained in Mount Hyjal, is crucial for specific gear upgrades․ Keep an eye on auction house trends to identify profitable materials․

Don’t underestimate the value of byproducts like Raw Beast Hide and Heavy Scrapes․ While individually inexpensive, they accumulate quickly and can be sold in bulk to vendors or utilized by other professions․ Efficiently managing your inventory and understanding material demand is key to maximizing your gold earnings․

Skinning Leveling Speed Strategies

Rapid skill-up requires a focused approach․ Prioritize zones with high mob density and fast respawn rates․ Combine skinning with questing or farming other materials to minimize downtime․ Utilize skinning trainers frequently to learn new ranks and maximize efficiency․

Consider grouping with friends or guildmates to clear areas quickly․ A dedicated farming route, optimized for mob type and proximity, is invaluable․ Don’t neglect the benefits of rested experience, which boosts skill gains․

For Cataclysm content, focus on areas like Uldum and Twilight Highlands, known for abundant skinnable creatures․ Remember to disenchant any unwanted greens or blues obtained while farming, adding another revenue stream․ Regularly check the auction house for material price fluctuations, adjusting your farming location accordingly․

Gold Making with Cataclysm Skinning

Cataclysm skinning offers substantial gold-making potential․ Heavy Leather, Rugged Leather, and Knothide Leather are consistently in demand by crafters․ Monitor auction house prices closely; demand fluctuates with raid tiers and crafting trends․

Beyond raw materials, consider crafting items like drums of war or potion ingredients requiring leather․ These often yield higher profit margins than selling raw hides․ Investigate rare hide drops, such as those used in specific recipes, as they command premium prices․

Efficiently managing your inventory is crucial․ Utilize auction house addons to automate listing and price tracking․ Diversify your income by also gathering herbs or mining while skinning, maximizing your time investment․ Remember to factor in the Auction House cut when calculating profits․

Resources and Further Information

For comprehensive WoW information, explore Wowhead ([https://www․wowhead․com/](https://www․wowhead․com/))․ Their database details skinning trainers, mob locations, and item drop rates․ Icy Veins ([https://www․icy-veins․com/](https://www․icy-veins․com/)) provides class guides and profession overviews, including skinning strategies․

YouTube channels like those dedicated to WoW gold making often feature Cataclysm skinning tips and auction house analysis․ Search for “Cata Skinning Gold” to find relevant videos․ Dedicated WoW forums and Reddit communities (r/wownoob, r/wowclassic) are excellent for asking questions and sharing experiences․

Remember to utilize in-game resources like the Auction House and trade chat to gauge market prices and identify profitable opportunities․ Regularly check for updates to profession recipes and item values as the game evolves․ Stay informed and adapt your strategies for maximum success!

Continue Reading

compression socks sizing guide

Compression socks offer diverse recovery benefits for runners, travelers, and those on their feet all day, ensuring healthy circulation and reducing swelling.

Understanding Compression Levels (mmHg)

Compression levels, measured in millimeters of mercury (mmHg), dictate the amount of pressure the socks exert on your legs and feet. These levels aren’t arbitrary; they’re designed to address specific needs, ranging from everyday comfort to serious medical conditions. Lower levels, like 15-20 mmHg, provide gentle support, ideal for daily wear and preventing mild swelling.

As you move up the scale, 20-30 mmHg is frequently chosen by travelers to combat swelling during long journeys and athletes for post-exercise recovery. 30-40 mmHg compression typically requires a doctor’s recommendation and is used to manage more significant venous insufficiency or lymphedema. Finally, 40-50 mmHg is reserved for severe conditions and always necessitates medical supervision. Choosing the correct mmHg is crucial for effectiveness and comfort.

15-20 mmHg Compression: Everyday Wear

15-20 mmHg compression socks are the most commonly recommended level for everyday use, offering a gentle yet effective boost to circulation. They’re perfect for individuals who spend long periods standing or sitting, experiencing mild swelling, or simply seeking preventative leg care. These socks help reduce fatigue and discomfort, promoting overall leg wellness.

Many find them beneficial during work, travel (short flights), or even while relaxing at home. They’re a comfortable starting point for those new to compression therapy and can be worn throughout the day without causing undue restriction. Think of them as a proactive measure to support healthy blood flow and maintain energized legs. They are deceptively simple, yet provide myriad benefits.

20-30 mmHg Compression: Travel & Recovery

20-30 mmHg compression socks are ideal for travel, particularly long flights, and post-exercise recovery. This level provides a moderate amount of compression, helping to prevent deep vein thrombosis (DVT) during travel by encouraging healthy blood flow and reducing swelling in the legs and ankles. Athletes often utilize this compression to aid muscle recovery after intense workouts or competitions.

They’re also beneficial for individuals experiencing moderate swelling, varicose veins, or minor lymphedema. Wearing these socks during and after physical activity can minimize muscle soreness and fatigue, accelerating the healing process. They offer a noticeable improvement in leg comfort and support, making them a versatile choice for active lifestyles and extended periods of immobility.

30-40 mmHg Compression: Medical Use

30-40 mmHg compression socks are generally prescribed for medical conditions requiring a higher level of support. These are frequently recommended by healthcare professionals for managing more significant venous insufficiency, lymphedema, and post-thrombotic syndrome. They aid in reducing leg swelling and discomfort associated with these conditions, promoting improved circulation and preventing complications.

Individuals recovering from vein surgery or sclerotherapy often benefit from this level of compression. It’s crucial to consult with a doctor before using 30-40 mmHg socks, as they are not suitable for everyone. Proper fitting is paramount to ensure effectiveness and avoid potential complications. These socks provide substantial support and are designed for daily, long-term wear under medical guidance.

40-50 mmHg Compression: Severe Conditions

40-50 mmHg compression socks represent the highest level of compression typically available without a custom prescription. These are reserved for individuals with severe medical conditions, such as advanced venous ulcers, severe lymphedema, or significant post-thrombotic syndrome complications. They are almost always prescribed and monitored by a physician or vascular specialist.

This level of compression requires careful consideration and professional guidance due to its intensity. Improper use can lead to skin irritation or, in rare cases, compromise circulation. These socks are designed to dramatically reduce swelling, improve venous return, and aid in wound healing. Consistent wear, as directed by a healthcare provider, is essential for managing these complex conditions and preventing further deterioration.

Measuring for Compression Socks

Accurate measurements are crucial for ensuring compression socks provide the intended benefits and comfort. Unlike standard sock sizing, compression sock sizes are determined by specific leg circumference measurements, not just shoe size. You’ll need a flexible measuring tape for this process, and it’s best performed in the morning before any swelling occurs.

The three key measurements are ankle circumference, calf circumference, and leg length. Begin with the ankle at its narrowest point, then measure the widest part of the calf. Finally, measure from the back of your heel to the crease of your groin. These measurements, combined with a shoe size correlation, will guide you to the correct size range. Precise measurements prevent socks from being too tight or too loose, maximizing their effectiveness.

Ankle Measurement: Key Starting Point

The ankle measurement serves as the foundational element in determining the correct compression sock size. Using a flexible measuring tape, locate the narrowest point of your ankle – typically just above the ankle bone. Ensure the tape is snug but not constricting, lying flat against the skin without overlapping. Record this measurement in inches or centimeters, being precise to the nearest quarter inch or millimeter.

This initial measurement is vital because compression socks are designed to provide graduated compression, meaning they exert the most pressure at the ankle and gradually decrease up the leg. An inaccurate ankle measurement can lead to improper compression distribution, diminishing the sock’s benefits and potentially causing discomfort. Always measure both ankles and use the larger measurement for sizing consistency.

Calf Measurement: Widest Part

Following the ankle measurement, determining your calf circumference is crucial for a proper fit. Locate the widest part of your calf, usually several inches below the knee. Maintain a relaxed, natural stance – do not flex or tense your calf muscle during measurement. Wrap the flexible measuring tape around your calf at this widest point, ensuring it remains level and doesn’t constrict.

Record this measurement with the same precision as the ankle measurement (nearest quarter inch or millimeter). The calf measurement is particularly important as it dictates the sock’s diameter and overall comfort. A calf measurement that’s too small can cause the sock to bind, while one that’s too large can lead to slippage and reduced compression effectiveness. Always double-check the tape’s position for accuracy.

Leg Length Measurement: Heel to Groin

Accurate leg length measurement is vital, especially for thigh-high compression socks, ensuring proper coverage and compression distribution. Begin the measurement at the back of your heel and extend it up to your groin – this is the longest point in that area. It’s best to have assistance with this measurement for greater accuracy, as reaching your own groin can be difficult.

Stand straight with your leg slightly bent. Use a flexible measuring tape and follow the curve of your leg. Record the measurement in inches or centimeters. This measurement helps determine the appropriate sock length, preventing bunching or being too short. Incorrect length can compromise the sock’s effectiveness and comfort. Ensure the tape is snug but not constricting during the process.

Shoe Size Correlation

While not the primary sizing factor, your shoe size offers a useful starting point when selecting compression socks, particularly for knee-high or below-knee styles. Most compression sock brands correlate their sizes with standard US shoe sizes, providing a quick reference guide. However, relying solely on shoe size can be misleading, as foot and calf dimensions vary significantly.

Generally, smaller shoe sizes (women’s 5-7, men’s 6-8) often correspond to small sock sizes, while larger sizes (women’s 9+, men’s 10+) align with medium, large, or extra-large. Always cross-reference your shoe size with ankle and calf measurements for a precise fit. Consider width as well; wider feet may require a larger size to avoid constriction. Use shoe size as an initial guide, but prioritize accurate circumference measurements for optimal compression.

Standard Compression Sock Size Charts

Compression sock sizing isn’t one-size-fits-all; charts categorize sizes based on ankle and calf circumference, and leg length. These charts typically offer ranges for each size (Small, Medium, Large, Extra Large), providing guidelines for a comfortable and effective fit. Remember these are general guidelines, and variations exist between brands.

A typical chart might show Small fitting ankle circumferences of 8-10 inches and calf circumferences of 14-16 inches. Medium could be 10-12 inches (ankle) and 16-18 inches (calf), and so on. Leg length is also crucial, especially for thigh-high styles. Always consult the specific chart provided by the manufacturer, as sizing can differ significantly. Accurate measurements are key to avoiding socks that are too tight or loose.

Small Size Range

Generally, the small size range in compression socks caters to individuals with smaller leg measurements. This typically includes ankle circumferences falling between 8 and 10 inches, and calf measurements ranging from 14 to 16 inches. However, it’s vital to remember these are average figures and can vary slightly between different brands and manufacturers.

For those within this range, a proper fit ensures adequate compression without causing discomfort or restricting circulation. Leg length is also a factor; small sizes often accommodate shorter leg lengths, usually up to around 26 inches. Always prioritize accurate measurements and consult the specific size chart provided by the brand you’re considering; A well-fitted small size will provide optimal support and therapeutic benefits.

Medium Size Range

The medium size range in compression socks is designed for individuals with moderately sized legs. Typically, this encompasses ankle measurements between 10 and 12 inches, and calf circumferences ranging from 16 to 18 inches. As with all sizes, brand-specific variations exist, so referencing the manufacturer’s chart is crucial for an accurate fit.

A correctly fitted medium size provides effective compression to promote circulation and reduce swelling without being overly constricting. Leg length considerations are also important; medium sizes generally suit legs measuring between 26 and 29 inches. Prioritizing precise measurements – ankle and calf – is key to selecting the right size. A properly sized medium compression sock will deliver optimal comfort and therapeutic advantages.

Large Size Range

The large size range in compression socks caters to individuals with larger leg dimensions. Generally, this size accommodates ankle measurements between 12 and 14 inches, and calf circumferences ranging from 18 to 20 inches. However, it’s vital to remember that sizing can differ significantly between brands, making a detailed chart review essential for optimal fit;

A well-fitted large size delivers effective compression, supporting circulation and minimizing swelling without causing discomfort. Leg length is also a factor, with large sizes typically fitting legs measuring 29 to 32 inches. Accurate ankle and calf measurements are paramount when selecting the appropriate size. A correctly sized large compression sock will provide the intended benefits – improved blood flow and reduced leg fatigue – with maximum comfort.

Extra Large Size Range

The extra-large size range is designed for individuals with substantial leg measurements, ensuring a comfortable and effective compression experience. Typically, this size fits ankle circumferences between 14 and 16 inches, and calf measurements ranging from 20 to 24 inches. However, brand-specific variations are common, so consulting detailed size charts is crucial before purchasing.

Properly fitted extra-large compression socks provide essential support for improved circulation and reduced swelling, particularly for those who spend extended periods standing or sitting. Leg length is also a key consideration, with this size generally accommodating legs measuring 32 to 36 inches. Accurate measurements of both ankle and calf are vital for achieving the correct fit, maximizing the therapeutic benefits and ensuring all-day comfort.

Brand-Specific Sizing Variations

Compression sock sizing isn’t universally standardized; significant variations exist between manufacturers like Juzo, Sigvaris, and CEP. What constitutes a “Large” in one brand may differ considerably from another, emphasizing the importance of referencing each brand’s unique size chart. These differences stem from variations in sock construction, materials used, and the intended compression profile.

For instance, Juzo often utilizes a more European-centric sizing system, while Sigvaris may have a broader range of widths available. CEP, known for its athletic compression wear, might prioritize a snugger, performance-oriented fit. Always prioritize the specific measurements provided by the brand you choose, rather than relying on general size guidelines. Ignoring these nuances can lead to an ill-fitting sock, diminishing its effectiveness and comfort.

Juzo Sizing Charts

Juzo employs a detailed sizing system based on ankle and calf circumference, alongside leg length measurements. Their charts typically categorize sizes using a letter system (e.g., B, G, C) corresponding to calf width, combined with a number indicating length. Accurate ankle measurement is crucial as it forms the foundation of their sizing recommendations.

Juzo offers both standard and extended sizes to accommodate a wider range of body types. It’s important to note that Juzo charts often differentiate between compression levels (15-20, 20-30, 30-40, 40-50 mmHg), each potentially requiring a slightly different size. Referencing the specific chart for your desired compression level is vital. Online resources and the official Juzo website provide comprehensive sizing guides, often including downloadable charts for easy reference. Precise measurements are key to achieving the correct fit with Juzo compression socks.

Sigvaris Sizing Charts

Sigvaris utilizes a sizing approach centered around ankle and calf measurements, coupled with leg length, to ensure a precise fit. Their sizing system commonly uses a combination of numbers and letters – a number representing the leg length and a letter denoting the calf circumference (like A, B, C, D, E, G). Accurate measurements are paramount for optimal compression and comfort.

Sigvaris charts are often categorized by compression level, meaning a different size might be needed for 15-20 mmHg versus 30-40 mmHg. They provide detailed charts online, allowing users to cross-reference their measurements with the corresponding size. It’s crucial to consult the chart specific to the compression level you require. Sigvaris also considers shoe size as a secondary reference point. Proper sizing with Sigvaris compression socks guarantees effective support and therapeutic benefits.

CEP Sizing Charts

CEP compression socks generally employ a sizing system based primarily on shoe size, although ankle and calf circumference play a supporting role, particularly for individuals falling between sizes. CEP charts typically present ranges of shoe sizes corresponding to specific sock sizes (e.g., Small, Medium, Large, Extra Large). They emphasize the importance of accurate shoe size determination, recommending measuring both feet and using the larger size as a guide.

CEP’s sizing charts are readily available on their website and often include conversion tables for international shoe sizes. While less reliant on precise calf measurements compared to brands like Sigvaris or Juzo, CEP acknowledges that a snug, but not overly tight, fit is essential. Consulting the CEP size guide ensures optimal performance and comfort during athletic activities or daily wear. Correct sizing maximizes the benefits of CEP’s graduated compression technology.

Troubleshooting Sizing Issues

Incorrectly sized compression socks can diminish their effectiveness and cause discomfort. If socks feel too tight, restricting circulation or causing pain, you likely need a larger size. Redness, numbness, or difficulty removing the socks are clear indicators of excessive compression. Conversely, socks that are too loose won’t provide adequate support or compression, failing to deliver the intended benefits.

When experiencing sizing issues, re-measure your ankle and calf circumference, ensuring accurate measurements are taken. Consider the compression level; higher compression levels may require a more precise fit. If you’re between sizes, it’s generally better to size up. Don’t hesitate to consult the brand’s specific sizing chart, as variations exist. Proper fit is crucial for maximizing the therapeutic advantages of compression socks.

Socks Too Tight

If your compression socks feel excessively tight, it’s a sign that the size is incorrect, potentially hindering circulation and causing discomfort. Common indicators include difficulty pulling the sock up, noticeable redness or skin discoloration on your legs, and a persistent feeling of constriction. Numbness or tingling sensations are also warning signs that the compression is too strong.

Immediately remove the socks if you experience any of these symptoms. Attempting to force circulation can be harmful. Re-evaluate your measurements, ensuring accuracy, and consider sizing up to the next available size. Remember that higher compression levels (30-40 or 40-50 mmHg) naturally feel firmer, but should never cause pain. Consult the brand’s sizing chart for specific guidance, and prioritize comfort and healthy blood flow.

Socks Too Loose

When compression socks don’t fit snugly, they fail to deliver the intended benefits of improved circulation and reduced swelling. Signs of a loose fit include the sock sliding down your leg, bunching around the ankle, or feeling generally slack. If you can easily bunch up the fabric, it’s likely too large. A properly fitted sock should feel supportive and conforming to your leg’s shape, without being restrictive.

If your socks are too loose, consider sizing down. Double-check your measurements, paying close attention to both ankle and calf circumference. Ensure you’re measuring at the correct points – the narrowest part of the ankle and the widest part of the calf. A loose sock won’t provide adequate compression, diminishing its effectiveness. Prioritize a secure, yet comfortable, fit for optimal results.

Dealing with Different Compression Levels & Sizes

Navigating compression levels (15-20, 20-30, 30-40, 40-50 mmHg) and corresponding sizes requires careful attention. Higher compression levels often necessitate more precise measurements and potentially different sizing charts, even within the same brand. Remember that size ranges can vary significantly between manufacturers – a medium in one brand might be a large in another.

When transitioning between compression levels, re-measure your legs. Increased compression may require a different size than you typically wear at lower levels. Don’t assume your usual size will remain consistent. Always consult the specific sizing chart provided by the brand you’re purchasing from. Prioritize comfort and effectiveness; a properly fitted sock, regardless of compression level, is crucial for achieving the desired therapeutic benefits.

Resources for Finding Your Size

Finding the perfect fit often extends beyond standard size charts. Many brands, like Juzo, Sigvaris, and CEP, offer detailed online sizing guides and even virtual fitting assistance. Websites dedicated to compression therapy frequently host comprehensive size charts and comparison tools. GitHub projects, such as “Juzo–Compression-Sock-Sizing-Chart,” provide patient-focused resources for navigating specific brand measurements.

Consider consulting with a healthcare professional or a trained fitter, especially if you require medical-grade compression (30-40 or 40-50 mmHg). They can provide personalized recommendations based on your individual needs and leg measurements. Don’t hesitate to utilize customer support offered by the brand; they can often clarify sizing ambiguities and ensure you select the appropriate size for optimal comfort and efficacy.

Continue Reading