Soins de Plaies et Pansements: Guide Pratique
GUIDE POUR LES PANSEMENTS ET LE SOIN DES PLAIES! This practical guide‚ crafted by wound care experts‚ offers optimal treatment strategies․ This guide offers a way to properly treat and monitor wounds․
Wound care is an evolving field‚ demanding nurses possess the knowledge to create effective treatment plans based on wound evaluations․ Traditionally‚ wound care focused on keeping lesions clean and dry․ This guide‚ developed by experts‚ addresses challenging wounds encountered in daily practice; Proper application of dressings is crucial for wound management‚ aiming to maintain a moist environment conducive to healing while preventing maceration․ Dressings also protect against shocks‚ friction‚ and environmental factors‚ promoting optimal wound recovery and minimising complications through proper techniques․

Évaluation Initiale de la Plaie
Effective wound care begins with a comprehensive initial assessment․ This involves evaluating all areas of the wound‚ including the wound bed‚ wound edges‚ and perilesional skin‚ which is crucial․ Accurate measurement of length‚ width‚ and depth is necessary for monitoring healing progress․ Also‚ it is important to use a specific vocabulary regarding dressings․ Assessing these aspects helps determine the wound’s characteristics‚ potential complications‚ and appropriate treatment strategies․ Consistent evaluation and documentation are vital for tracking changes and adjusting the care plan to optimize patient outcomes in wound management․
Évaluation des Zones de la Plaie
A thorough evaluation of the wound involves examining distinct zones: the wound bed‚ the wound edge‚ and the periwound skin․ Assessing these areas helps determine the wound’s overall health and healing potential․ Each zone provides unique insights into the wound’s condition․ Evaluating all zones allows for a more accurate assessment of the wound’s status and helps guide the selection of appropriate interventions․ Consistent evaluation and documentation are essential for monitoring changes and adjusting the care plan as needed to promote optimal wound healing outcomes․
Lit de la plaie
The wound bed is the deepest part of the wound and requires careful assessment to determine its composition and condition․ Key aspects to evaluate include the presence of granulation tissue‚ slough‚ or necrotic tissue․ Healthy granulation tissue indicates active healing․ Slough‚ a yellow or tan stringy substance‚ can impede healing and may require debridement․ Necrotic tissue‚ which is dead or devitalized tissue‚ must be removed to promote wound closure․ The color and texture of the wound bed provide valuable information about the wound’s stage of healing․
Bord de la plaie
The wound edge‚ or border‚ is a crucial area to assess during wound care․ Observe the color‚ thickness‚ and attachment of the wound edge to the wound bed․ Ideally‚ the wound edge should be well-defined‚ pink or light red‚ and closely attached to the wound bed․ Rolled or epibolic edges‚ where the skin rolls under‚ can indicate stalled healing․ Undermining‚ where tissue destruction occurs under intact skin along the wound edge‚ is another important consideration․ These characteristics can affect dressing selection and treatment strategies․
Peau périlésionnelle
The periwound skin‚ or skin surrounding the wound‚ is vital for assessing overall wound health․ Examine the color‚ temperature‚ moisture‚ and integrity of this area․ Look for signs of maceration (excessive moisture)‚ dryness‚ erythema (redness)‚ induration (hardening)‚ or edema (swelling)․ Maceration can result from excessive exudate‚ while dryness may indicate dehydration or poor circulation․ Erythema and induration may signal infection or inflammation․ Protecting periwound skin is essential to prevent further breakdown and promote optimal wound healing․
Mesure de la Plaie
Accurate wound measurement is crucial for monitoring healing progress․ Consistent measurement techniques ensure reliable data for assessing treatment effectiveness․ Measure wound length‚ width‚ and depth using a disposable measuring device․ Length is typically measured head-to-toe‚ and width side-to-side․ Depth is measured at the deepest point of the wound bed․ Document measurements in centimeters or millimeters‚ including the date and time․ Regular measurements‚ along with photographic documentation‚ provide a comprehensive record of wound changes over time‚ aiding in treatment adjustments․
Longueur‚ largeur‚ profondeur
When measuring a wound‚ precise techniques are essential for accuracy․ Length is typically the longest dimension‚ measured from head to toe․ Width is the widest point perpendicular to the length․ Depth is the distance from the skin surface to the deepest part of the wound bed․ Use a sterile‚ flexible measuring tool․ Document all measurements in centimeters or millimeters․ Consistency in measurement technique helps ensure accurate tracking of healing progress․ Regular and accurate wound measurements are vital for effective wound care management․
Principes Fondamentaux des Soins de Plaies
Effective wound care hinges on several fundamental principles; First‚ meticulous wound cleaning removes debris and prevents infection․ Maintaining a moist wound environment promotes cell migration and healing․ Adequate protection shields the wound from trauma and contamination․ Regular assessment allows for timely adjustments to the treatment plan․ Choosing the right dressing optimizes moisture balance and promotes healing․ Patient education empowers individuals to actively participate in their care․ Proper nutrition supports tissue repair and overall well-being․ These principles guide clinicians in providing comprehensive wound care․
Maintenir un milieu humide
Maintaining a moist wound environment is crucial for optimal healing․ Unlike the traditional approach of keeping wounds dry‚ a moist environment facilitates cell migration‚ angiogenesis‚ and autolytic debridement․ A moist environment prevents the wound from drying out‚ which can lead to cell death and impaired healing․ Hydrocolloids will maintain a moist environment and absorb exudates! Dressings that maintain moisture include hydrogels‚ films‚ foams‚ and hydrocolloids․ Choosing the appropriate dressing depends on the wound type and the amount of exudate․ Consistent monitoring ensures the maintenance of optimal moisture levels throughout the healing process․

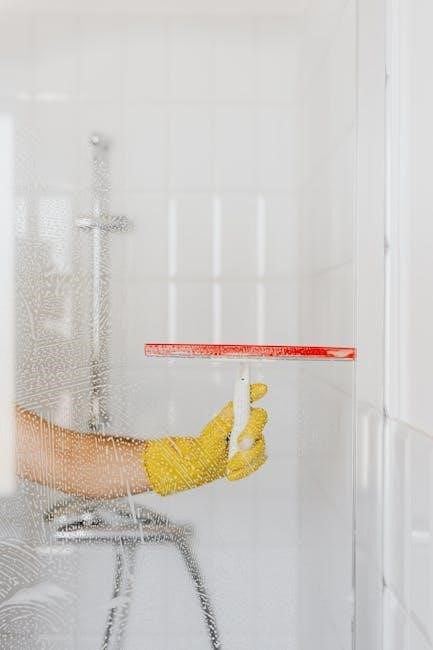
Protection contre les chocs et frottements
Protecting wounds from external trauma is essential for preventing further injury and promoting healing․ Dressings act as a barrier against physical impacts‚ friction from clothing‚ and environmental contaminants․ Adequate protection reduces the risk of disrupting newly formed tissue and minimizes pain․ Select dressings that provide cushioning and conform to the body’s contours․ Secure dressings properly to prevent movement and shear forces․ Regularly assess the dressing’s integrity and replace it when necessary․ Proper protection creates a stable environment‚ allowing the wound to heal undisturbed․ Choose wisely so that the appropriate protection is given for the wound․
Types de Pansements et Indications
Selecting the appropriate dressing is critical for effective wound management․ Various types of dressings cater to different wound characteristics and healing stages․ Hydrocolloids maintain a moist environment and absorb exudate․ Alginates are ideal for highly exuding wounds‚ while foams provide cushioning and absorbency․ Films are suitable for superficial‚ low-exudate wounds․ Hydrogels hydrate dry wounds and promote autolytic debridement․ Consider wound depth‚ exudate level‚ infection status‚ and patient comfort when choosing a dressing․ Regular assessment and adjustment of the dressing type are necessary to optimize healing outcomes․ The proper dressing is the first step to wound care․
Hydrocolloïdes
Hydrocolloid dressings are versatile wound care products designed to promote moist wound healing․ They consist of a gel-forming agent‚ such as pectin or carboxymethylcellulose‚ within an adhesive matrix․ Upon contact with wound exudate‚ the hydrocolloid forms a gel‚ creating a moist environment that supports autolytic debridement and granulation tissue formation․ They are suitable for wounds with low to moderate exudate․ They are available in various shapes and sizes to fit different wound types․ Hydrocolloids offer protection from external contamination and can remain in place for several days‚ reducing the frequency of dressing changes․ They maintains a humid environment․
Algorithme de choix du pansement
Selecting the appropriate dressing involves assessing wound characteristics․ We need to consider factors like wound depth‚ exudate level‚ infection presence‚ and the condition of surrounding skin․ Start by identifying the wound type and its healing stage․ Then‚ determine the primary goals‚ such as moisture balance‚ infection control‚ or debridement․ Evaluate the amount of exudate․ Choose a dressing that can effectively manage it while maintaining a moist wound bed․ Also‚ take into account any patient-related factors‚ such as allergies‚ comfort‚ and ability to adhere to the dressing regimen‚ and whether to use Hydrocolloids or something different․
Techniques de Nettoyage de la Plaie

Proper wound cleansing is paramount for preventing infection and promoting healing․ Begin by washing hands thoroughly with soap and water․ Use appropriate solutions like sterile saline or mild soap and water․ Avoid harsh antiseptics‚ as they can damage healthy tissue․ Employ a gentle irrigation technique to remove debris and contaminants․ For adherent debris‚ use a soft‚ sterile gauze pad․ Mechanical cleaning with a tampon with NaCl 0․9 and forceps can be done․ Dry the skin around the wound gently with a clean towel or gauze․ Always follow prescribed cleaning protocols․
Solutions de nettoyage appropriées
Selecting the correct cleansing solution is crucial for effective wound care․ Sterile saline solution is generally the preferred choice due to its isotonic nature‚ which minimizes tissue damage․ Mild‚ pH-balanced wound cleansers are also suitable for removing debris and contaminants․ Avoid using harsh antiseptics like hydrogen peroxide or povidone-iodine on open wounds‚ as they can impede healing․ Tap water may be used for initial cleansing but is not recommended for deep or chronic wounds․ Always follow healthcare provider recommendations for specific wound types and conditions․
Méthode de nettoyage mécanique
Mechanical wound cleaning involves physically removing debris and contaminants from the wound bed․ Use a sterile gauze pad or swab moistened with the chosen cleansing solution․ Gently wipe or irrigate the wound‚ starting from the center and moving outward․ Avoid scrubbing vigorously‚ as this can damage healthy tissue․ For adherent debris‚ consider using a soft brush or hydrotherapy․ Ensure all cleaning materials are sterile to prevent infection․ Dry the surrounding skin carefully after cleansing․ Dispose of used materials properly following infection control protocols‚ promoting optimal wound healing․
Prévention de l’Infection
Preventing wound infection is crucial for optimal healing․ Employ strict hand hygiene before and after wound care․ Use sterile instruments and dressings․ Cleanse the wound with appropriate solutions like saline or antiseptic cleansers․ Monitor for signs of infection‚ including increased pain‚ redness‚ swelling‚ pus‚ or fever․ Consider prophylactic antibiotics for high-risk wounds‚ guided by medical protocols․ Educate patients on proper wound care and hygiene․ Ensure adequate nutrition and hydration to support immune function․ Promptly address any signs of infection to minimize complications and promote effective wound closure‚ improving patient outcomes․
Signes d’infection
Recognizing the signs of infection in a wound is vital for timely intervention․ Key indicators include increased pain or tenderness around the wound site․ Observe for redness (erythema) extending beyond the wound edges‚ along with localized swelling (edema)․ Purulent drainage‚ characterized by thick‚ discolored pus‚ is a significant sign․ A foul odor emanating from the wound may also suggest infection․ Systemic symptoms such as fever‚ chills‚ or malaise can indicate a spreading infection․ Delayed healing or wound breakdown despite appropriate care should raise suspicion․ Promptly report any of these signs to a healthcare professional for evaluation and treatment․
Mesures de prévention
Preventing wound infections involves meticulous hygiene and appropriate wound care practices․ Start with thorough handwashing before and after touching any wound․ Use sterile gloves when handling dressings or cleaning the wound․ Cleanse the wound with appropriate solutions‚ following healthcare provider instructions․ Cover the wound with a sterile dressing to protect it from external contaminants․ Ensure the dressing is changed regularly‚ based on wound type and exudate levels․ Promote overall health through proper nutrition and hydration to support immune function․ Avoid scratching or picking at the wound․ Educate patients and caregivers on proper wound care techniques and signs of infection․
Gestion de l’Exsudat
Effective exudate management is vital for optimal wound healing․ Excessive wound drainage can hinder the healing process and increase infection risk․ Select appropriate dressings based on the volume and type of exudate․ Alginates and foams are excellent for highly exuding wounds‚ while hydrocolloids suit moderate exudate․ Change dressings frequently to prevent saturation‚ which can lead to maceration․ Monitor the wound bed and periwound skin for signs of excessive moisture․ Implement compression therapy‚ if appropriate‚ to reduce edema and promote venous return․ Address underlying factors contributing to excessive exudate‚ such as infection or inflammation․ Proper exudate management promotes a moist wound environment‚ facilitating healing․
Types de pansements absorbants
Various absorbent dressings cater to different exudate levels․ Alginate dressings‚ derived from seaweed‚ are ideal for heavily exuding wounds․ Foam dressings provide excellent absorption and cushioning․ Superabsorbent polymers manage significant fluid volumes while maintaining a moist wound environment․ Composite dressings combine absorbent layers with other beneficial components like antimicrobials․ Gauze‚ though traditional‚ requires frequent changes due to limited absorption․ Selecting the appropriate absorbent dressing is crucial for effective exudate management․ Consider wound characteristics‚ exudate volume‚ and patient comfort․ Proper dressing selection supports optimal wound healing and minimizes complications․ Change the dressing based on the wound condition and the saturation of the dressing․
Fréquence de changement selon l’exsudat
Dressing change frequency hinges on exudate volume․ High exudate necessitates more frequent changes to prevent maceration and infection․ Conversely‚ low exudate allows for less frequent changes‚ maintaining a moist wound environment without oversaturation․ Regularly assess the dressing for saturation․ Heavily saturated dressings require immediate replacement․ Consider the dressing type; some are designed for extended wear․ Patient comfort and wound condition guide change frequency․ Monitor for signs of leakage or odor‚ indicating a need for change․ Follow manufacturer guidelines․ Balance maintaining a healthy wound environment with minimizing disruption; Proper change frequency optimizes healing․
Rôle de l’Infirmière dans les Soins de Plaies
Nurses play a pivotal role in wound care‚ encompassing assessment‚ planning‚ intervention‚ and evaluation․ Initially‚ nurses meticulously evaluate wounds‚ noting size‚ depth‚ exudate‚ and surrounding skin․ They formulate individualized care plans‚ selecting appropriate dressings and cleaning techniques․ Nurses expertly perform wound cleansing‚ debridement‚ and dressing applications․ Patient education is crucial‚ empowering self-care and adherence to treatment․ Nurses vigilantly monitor for infection signs‚ adjusting care as needed․ Collaboration with physicians and other healthcare professionals ensures comprehensive care․ Accurate documentation tracks progress and informs decisions․ Nurses champion evidence-based practices‚ promoting optimal wound healing and patient well-being․

Optimisation de la Cicatrisation
Documentation et Suivi
Meticulous documentation is paramount in wound care‚ providing a comprehensive record of the wound’s characteristics and treatment progression․ Initial assessments‚ including wound size‚ depth‚ exudate type‚ and surrounding tissue condition‚ are accurately documented․ All interventions‚ such as cleansing methods‚ dressing changes‚ and medications administered‚ are meticulously recorded․ Regular follow-up assessments track healing progress‚ noting any changes or complications․ Photographs can visually document wound appearance over time․ Patient education and adherence to treatment plans are also documented․ Accurate and timely documentation facilitates effective communication among healthcare providers‚ ensuring continuity of care and informed decision-making․ This detailed record serves as a valuable tool for evaluating treatment effectiveness․